

The World Robot Olympiad was held in Abu Dhabi, UAE in November 2011. I was one of the fortunate LEGO fans invited along to demonstrate to the leaders of tomorrow how LEGO has no boundaries when you use your imagination. Children from all over the world came to compete in the finals for robot building challenges. These were teams that had entered and won their National robot contests, and were now representing their respective countries on the world stage.
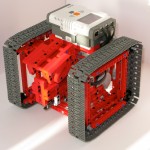
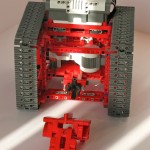
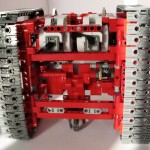
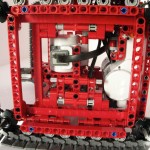
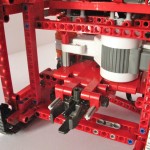
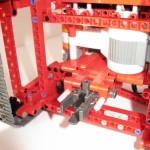
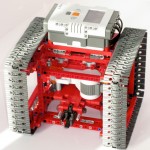
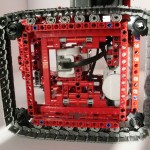
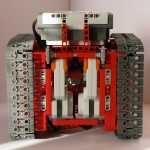
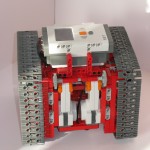
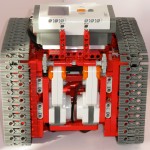
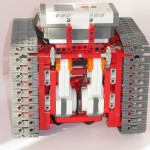
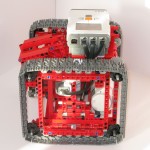
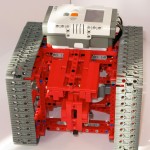
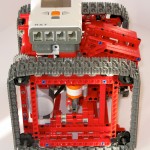
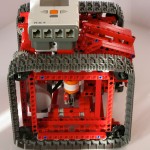
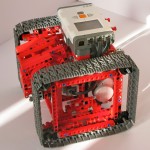
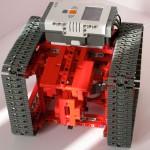
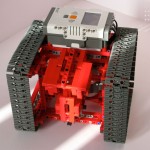
My Queboid robot has been around for a while, but for the World Robot Olympiad event in Abu Dhabi this year I decided to add a Zamor sphere shooter to the basic model. I swapped out the power function motors to use NXT motors. The idea was that kids could drive the robot using Philo’s joystick design communicating over Bluetooth from the remote to the NXT in the Queboid.
Building Instructions
• View step-by-step Queboid Shooter Building Instructions.pdf as a PDF file (28.6 MB download)
• View a gallery of images with step-by-step instructions.
• Download the QueboidShooter.ldr file to view in LDView or MLCad.
• The building instructions remote control for Queboid is from Philo’s joystick.
Programming
The Queboid control program is written in NXC. You need two NXTs; one is mounted on the Queboid robot, and the other is in the joystick unit. The joystick needs to connect to the Queboid using Bluetooth and is the master.
qbcontrol.nxc is the source code that runs on the control joystick.
qbslave.nxc is the source code that runs on the Queboid robot.
Operation
To operate the Queboids follow these steps:
- Turn on the NXT on the joystick and the Queboid.
- Enable Bluetooth on both NXTs.
- On the joystick search for the Queboid NXT in the Bluetooth menu.
- Connect to the Queboid from the joystick using Bluetooth.
- Start the qbslave program on the Queboid.
- Start the qbcontrol program on the joystick.
- Center the joystick and press the fire button.
- Push the joystick forward to drive forward, and left/right to turn. Press the joystick button to fire a ball.


Video
I brought the Queboid Shooters to the World Robot Olympiad in Abu Dhabi. You can watch a short video of them in action below:

You might remember the original Lego Street View Car I built in April. It was very popular at the Google Zeitgeist event earlier this year. I wanted to re-build the car to only use the Lego Mindstorms NXT motors. I was also keen to make it look more….car-like. The result, after 4 months of experimentation, is version 2.0 of the Lego Street View Car.
This Street View Car was showcased at the World Robot Olympiad event in Abu Dhabi in November 2011.
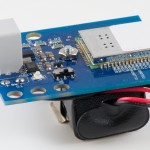
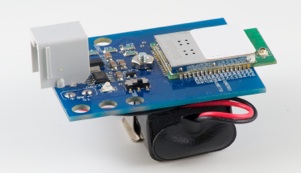
For this project I wanted to build a webserver using the new Dexter Industries Wifi sensor for the NXT. Dexter have produced a very exciting wifi sensor that you program through the RS485 port on port 4 of your NXT. The RS485 port can communicate with the wifi sensor at speeds up to 921600 baud, so your NXT can have high-speed Internet access!
One of the biggest challenges developing programs on the NXT is fixing them when they go wrong. The NXT has a small screen with only 8 lines of text displayed. It’s difficult to know what is causing a program to fail, and to have a record of what a program did.
I created this logging library in NXC to solve this problem. It presents a very simple API that you can use in your NXC programs to log data into a text log file as your program runs. Each entry is timestamped with the current NXT tick counter, so you can see when your program reached a certain point. The library supports logging text strings, values and byte arrays. Once your program has finished running you can download the log file to your PC using Bricxx or NeXTTools on the Mac.
How to use the logging library
To use the logging library you include it at the start of your NXC program as follows:
///////////////////////////////////////////////////////////
bool LOGGING=true;
#define LOGFILE "mylogfile.txt"
#define LOGFILE_SIZE 30000
#include "logging.nxc"
///////////////////////////////////////////////////////////
The boolean variable LOGGING enables or disables the logging functions. If set to true then data is logged into the log file. If false then nothing happens. Why add this? Well logging data to a file on the NXT takes time, and makes your program run slower. You can use the LOGGING variable to debug a program and then once you are satisfied that the program is correct simply set it to false and your program will no longer generate a logfile.
The name of the log file to create is defined in the LOGFILE macro. I suggest you name the logfile to be the same name as the program that creates it so you can keep track of which log files belong to which programs on your NXT.
The NXT firmware requires that every file must have a fixed size when it is created. In the example above the LOGFILE_SIZE macro is set to 30000 bytes. The logfile named mylogfile.txt will grow in size until it reaches 30000 bytes of content, at which point no new data is saved into the logfile.
Download the logfile library: logging.nxc.
Debug Logging Library API
The logging library contains the following functions:
- openLogFile(filename, filesize): this function creates a logfile with the given filename and filesize. It should be the first function called in your main() task.
- closeLogFile(): this function closes the logfile previously opened by openLogFile(). Only one logfile can be open at any one time in a program.
- writeLogString(s): write the string s to the logfile.
- writeLogByte(b): write a single byte value to the logfile.
- writeLogBytes(b): write a byte array to the logfile. A byte array can be any size. The byte array is written in hexadecimal format with each byte separated by a space.
- writeLogValue(s, v): write a (name,value pair) to the logfile. Used to record the value of a named variable. For example: writeLogValue(“foo is now”, foo);
- writeLogValue2(s, v1, v2): write a (name,value1,value2) triple to the logfile. Used to record the value of two variables, for example writeLogValue2(“Coordinates”, x, y)
- writeLogValue3(s, v1, vw, v3): write a (name,value1,value2,value3) quad to the logfile. Used to record the value of three variables, for example writeLogValue3(“Index”, i, j, k)
Sample Program
To see the logging library in operation I’ve provided an example program named logme.nxc below. It simple calls each of the logging functions to demonstrate how they work.
///////////////////////////////////////////////////////////

bool LOGGING=true;

#define LOGFILE "logme.txt"

#define LOGFILE_SIZE 3000

#include "logging.nxc"

///////////////////////////////////////////////////////////
task main() {
int i, j, k;
byte b[16];
openLogFile(LOGFILE, LOGFILE_SIZE);
writeLogString(“I have started main”);
i = 5;
j = 17;
writeLogValue2(“i, j”, i, j);
writeLogString(“initialising array…”);
for(i=0; i < 16; i++) {
b[i] = i * 5;
}
writeLogString(“Done”);
writeLogBytes(b);
closeLogFile();
}
Sample logfile output
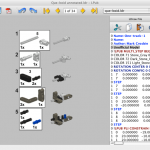
So what does the logfile look like from the program above? First of all we launch NeXTTools on the Mac (or Bricxx on your PC) to view the contents of the NXT filesystem.
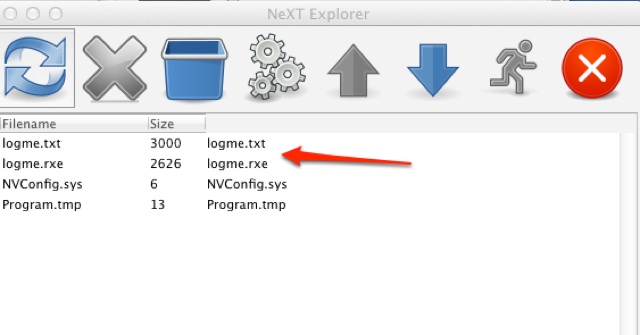
As you can see running the logme program create a logfile named logme.txt. Now let’s see what’s in the logfile (the timestamps in your logfiles will obviously be different as the clock in your NXT will not be the same as mine):
Logfile opened at 100175 ticks

100184 : I have started main

100186 : i, j = 5,  17

100187 : initialising array…

100191 : Done

100192 : 0 5 a f 14 19 1e 23 28 2d 32 37 3c 41 46 4b

Logfile closed at 100205 ticks


I was invited to attend the Google Zeitgeist Europe conference in London in 2011 as a member of the LEGO team displaying “cool” projects for the attendees. It was an amazing event, and I got to meet Prof. Stephen Hawking among other luminaries attending! I brought my LEGO Street View Car (version 1) along with me to show how there is no limit to what can be achieved with LEGO.


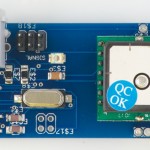
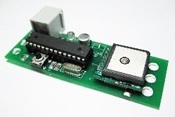 The Dexter Industries dGPS device provides the NXT with access to a real-time GPS sensor. The dGPS is a very useful device is you plan to do any mobile robotics that involve navigation and path-planning. Not only can it tell your robot where it is, but it will also give the direction of travel, speed of travel and allow for basic navigation.
 I got an iPad for Christmas. Santa really did read my Christmas letter, and I must have been a very good boy, because he delivered a 16GB 3G iPad all wrapped in its Apple-designed-in-Cupertino yummy box. My primary reason for getting one was to use it as a tool for building LEGO. I do most of my LEGO building at the kitchen table, as I am not lucky enough to have space for a “LEGO Lair” like others I know. Space is a premium, and I found that a laptop took up too much room when all I needed to do is browse some Building Instructions or look up a picture on Brickshelf. Enter the iPad.
I’ve gathered together a few pointers to applications that I find useful for improving my LEGO experience using the iPad. Everyone is different and your taste in apps will differ from mine. Let me know if I should add anything to the list… this is strictly a work-in-progress!
LEGO Building Instructions
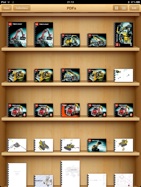
 My starting point was to gather all of my building instructions to view on the iPad. The iBooks reader on the iPad provides an electronic “bookshelf” that you can store books in. It was designed to read eBooks (few of which are available in Ireland) so I use it to view PDFs. PDF rendering in iBooks is not very fast, and it does not support some of the advanced note-taking and markup features in GoodReader. But for an app that is free with iOS 4.2 it gets the job done.
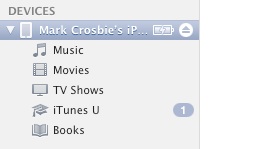
But how to get your building instructions in PDF format? The easiest way to get the official LEGO building instructions is from the LEGO website. LEGO provide a download service for BIs that provide them in handy PDF format at http://us.service.lego.com/en-US/BuildingInstructions/default.aspx. Download each building instruction in PDF format and then simply open iTunes and drag-n-drop the PDF files onto the iPad.
 If you have LDD files I suggest that you print them to PDF format. Choose F7 to select Building Guide mode, and then select Tool Box - Generate HTML Building Guide. Once the HTML guide is completely generated and saved open it in your web browser. If you are on a Mac it is a simple matter of choosing Print - Save to PDF to create a PDF file. On a PC I suggest you install CutePDF writer to create a virtual printer that generates PDF files and saves them to disk.
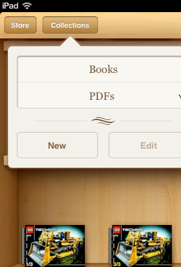
By default iBooks will display only the eBooks on your iPad. Tap the Collections button at the top left of the screen to choose PDFs and you will see the PDFs displayed on the bookshelf.
Once you have loaded the BIs into iBooks you can drag and drop them to rearrange the order that they appear on the screen.
GoodReader - a faster PDF reader
Let me explain; say you are browsing the instructions for the bulldozer set, and come across a really nifty technique that you’d like to remember for later. Using GoodReader you can markup the PDF file and save a note to yourself to come back to that page later.
GoodReader does a lot more than simply display PDFs and allow you to annotate them, and one of its biggest strengths is connecting to DropBox…
DropBox - keep your files in the Cloud
DropBox is an online file storage service that gives you a free allocation of 2GB. There are many other services that offer similar free storage such as MobileMe, io.net and box.net. However I find that most apps on the iPad support DropBox integration by default. What is the advantage of DropBox?
DropBox creates a local folder on your PC that it keeps in sync with your DropBox account in the Cloud. Any changes made on your DropBox folder locally are reflected back into the Cloud. DropBox keeps a version history of everything you’ve changed, so you can always undelete an important file.
![]() What has this got to do with LEGO? If you place all of your LEGO code, designs, PDFs and pictures into your DropBox account you will have access to them from anywhere in the world, including on your iPad! DropBox will simply keep everything in sync for you. Apps on the iPad that support DropBox will allow you to upload and download content into your DropBox, and next time you return to your PC or Mac the contents you create on your iPad are automatically added to your local DropBox folder.
What has this got to do with LEGO? If you place all of your LEGO code, designs, PDFs and pictures into your DropBox account you will have access to them from anywhere in the world, including on your iPad! DropBox will simply keep everything in sync for you. Apps on the iPad that support DropBox will allow you to upload and download content into your DropBox, and next time you return to your PC or Mac the contents you create on your iPad are automatically added to your local DropBox folder.
I use DropBox to store all of my LEGO code, building instructions and sample chapters for the book I’m writing. I can access them from any device (Mac at home, PC in work, laptop, iPad or iPhone).
EverNote - remember all of your LEGO ideas
![]() EverNote is another one of those amazing “how did I ever live without it” apps. EverNote is similar to DropBox in that it stores content for you in the Cloud. While DropBox stores files in a traditional folder structure, EverNote stores notes in a flat structure where you tag notes to allow for easy searching. It’s a different concept and takes some getting used to, but once you master it EverNote is an indispensable tool for research and note taking.
EverNote is another one of those amazing “how did I ever live without it” apps. EverNote is similar to DropBox in that it stores content for you in the Cloud. While DropBox stores files in a traditional folder structure, EverNote stores notes in a flat structure where you tag notes to allow for easy searching. It’s a different concept and takes some getting used to, but once you master it EverNote is an indispensable tool for research and note taking.
Notes in EverNote can be text, PDFs, pictures or just about anything you can see on your computer. Most importantly EverNote provides a “web-clipper” that installs into your browser; see a web-page that you like? Click the clipper button and it is automatically

added into your notes. EverNote is similar to DropBox in that it provides access to your notes from anywhere - however you have to download and install the EverNote client to access and create notes effectively. Clients are available for Mac, Windows, iPhone, iPad and more at their website.
How do I use EverNote to improve my LEGO building? As I browse cool and interesting designs on BrickShelf or MOCpages I click the web-clipper button to add them into my notes. I then add a “tag” so I can find them again; at a minimum they get a LEGO tag, and usually a BrickShelf tag along with some descriptive text. Say I found a great way to building a steering module for a truck; I would tag it LEGO, BrickShelf, steering, truck. A month from now when I want to find that picture all I have to do is type “steering” into the search bar and up pops my note!
EverNote can store photos you capture on your phone; as I build I might want to capture a work-in-progress photo of a design element of step. I can capture the photo on my iPhone using EverNote and it is automatically uploaded into my notes. Cool!
Nebulous - a simple text editor
 Nebulous is a text editor that is ideal for writing code and short text-based content. I use it for writing short snippets of NXC code for my book when I am out and about with my iPad. Nebulous is linked to DropBox; it reads content from your DropBox account and saves it locally for you to edit. When you are back online you can upload the content into the DropBox account where it is available on your PC or Mac.
I used Nebulous to write an entire chapter for my upcoming book. I would write the text in Nebulous and save it to DropBox. I also wrote all of the sample programs in NXC using Nebulous and saved them to DropBox. Once I was back at my Mac I was able to import the text into Scrivener (a writers program on the Mac) to create the final draft of the chapter.
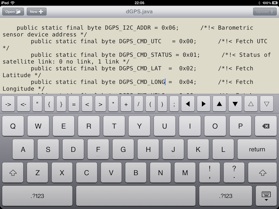
Nebulous has a customisable top-row on the on-screen keyboard that allows you to add commonly used characters to speed up your typing. I added the standard punctuation characters that NXC uses.
Textastic - a programmers editor
![]() The iPad was conceived as a content-consuming device; reading web pages, emails and viewing movies. But it has quickly become an effective content-producing device, especially if you pair it with the Apple Bluetooth keyboard. It didn’t take keen programmers long to realise that what they wanted was a programmer’s editor on the iPad. An editor that understood the syntax of the language you were writing, one that colour-highlighted syntax elements, correctly tabbed and indented code and gave programmers the tools they need to get code written without any fuss.
The iPad was conceived as a content-consuming device; reading web pages, emails and viewing movies. But it has quickly become an effective content-producing device, especially if you pair it with the Apple Bluetooth keyboard. It didn’t take keen programmers long to realise that what they wanted was a programmer’s editor on the iPad. An editor that understood the syntax of the language you were writing, one that colour-highlighted syntax elements, correctly tabbed and indented code and gave programmers the tools they need to get code written without any fuss.
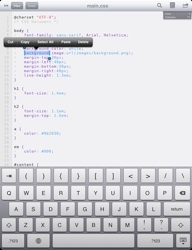
Textastic is a clean and effective coding tool for the iPad. I moved over to Textastic to create the NXC code for my book. Naturally it links to DropBox, so all of your files can be downloaded from DropBox into Textastic, edited and then uploaded again. Textastic understand the syntax for C (which covers NXC), Java (for leJOS) and Lua (for pbLua).
LPub4 is the best (and almost only) tool for generating building instructions for LEGO models. Developed over the years by Kevin Clague it has been used to generate the building instructions for numerous books. I use it for all of my own work.
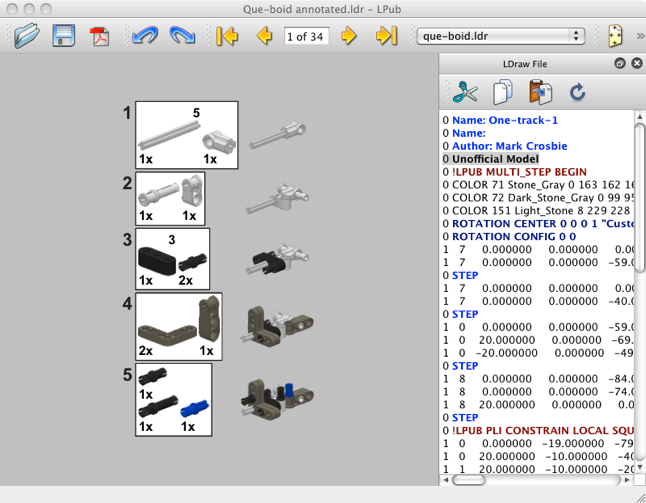
This tutorial will show you how to build the latest release of LPub4 for Mac OS using the native Mac developer tool: XCode. I have tested this using Mac OS 10.6.5 on an older spec MacBook Pro.
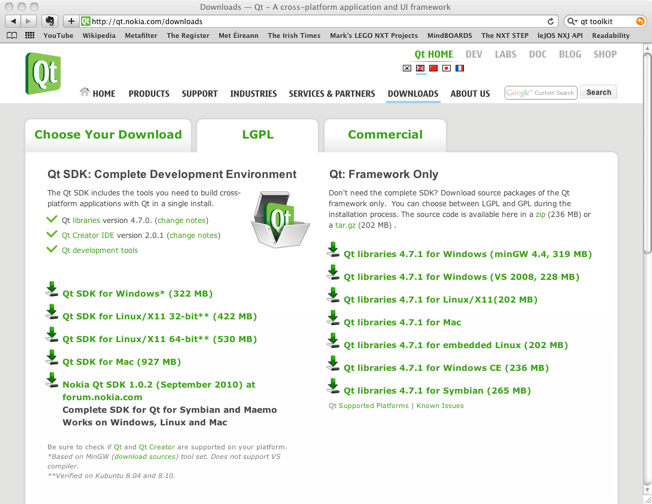
Download the latest Qt libraries
Qt is an open-source toolkit used for cross-platform graphics programming. It is ideal for building GUI applications such as LPub4. Before you can build LPub4 you will need the latest version of the Qt libraries installed on your Mac.
As of this writing the latest release is Qt 4.7.1. You can find more up-to-date versions at:http://qt.nokia.com/downloads. Be sure to select the LGPL option for downloading. You will be presented with a set of download options, much like the following screenshot. Select the Qt libraries 4.7.1 for Mac from the list on the right-hand side.
Once you have completed the download launch the Qt installer and follow through the standard installation steps for any piece of Mac software. The Qt libraries are installed in/usr/local/Qt4.7/
Get the latest LPub4 source
The source code for LPub4 is available in SourceForge. You can check out the latest code using cvs:
Start Terminal, and then enter:
cvs -d:pserver:[email protected]:/cvsroot/lpub4 login
which will log you into the CVS repository at sourceforge with anonymous access. Just press Enter when prompted for a password.
Next, download the latest LPub4 source tree:
cvs -z3 -d:pserver:[email protected]:/cvsroot/lpub4 co -P LPub4
you will see the source code being downloaded in your Terminal window, and it will end up in a folder named LPub4.
Install Xcode
Before you begin you will need a copy of Xcode, Apple’s development IDE for Mac OS. A copy of Xcode is located on your Mac OS install DVD. Insert the DVD and navigate to the XcodeTools package, double-click on it to launch the installer. Alternatively you can download XCode from the Mac developer website:http://developer.apple.com/technologies/tools/xcode.html.
Create the XCode Makefile
The next step is to create a Makefile for building LPub4 that is tailored to XCode builds. Change to the LPub4 directory where you copied the source code in Terminal. Enter the following command to create an XCode Makefile:
/usr/bin/qmake -spec /usr/local/Qt4.7/mkspecs/macx-xcode -macx -o Makefile LPub.pro
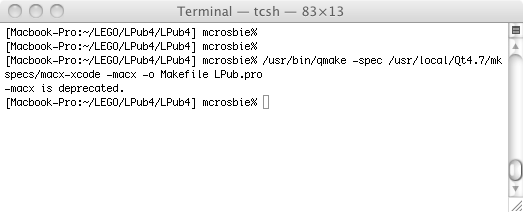
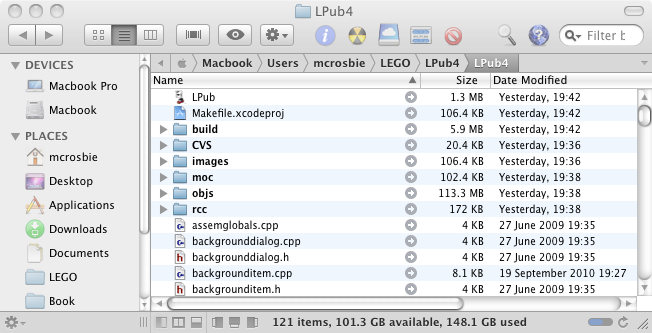
Not much seems to have happened (in the way of all good Unix tools ![]() but if you look in the LPub4 folder you will see that a new XCode project has been created:
but if you look in the LPub4 folder you will see that a new XCode project has been created:
Build LPub4 using XCode
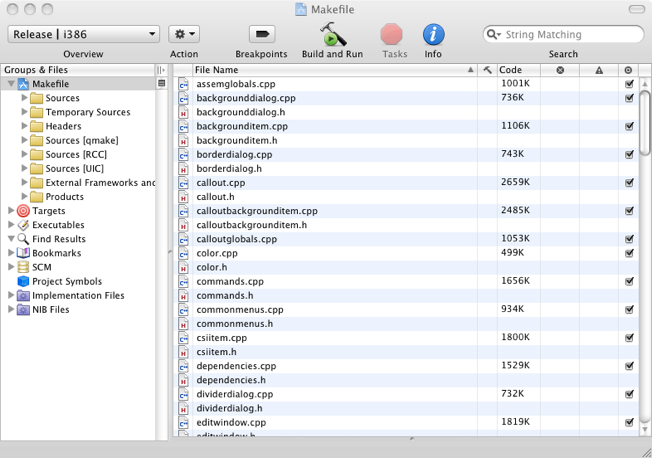
Wow, all this work and we still haven’t even built the code yet! Well don’t worry, we can now get to work and run XCode to do the build. Double click on the Makefile.xcodeproj in your Finder to launch XCode 3:
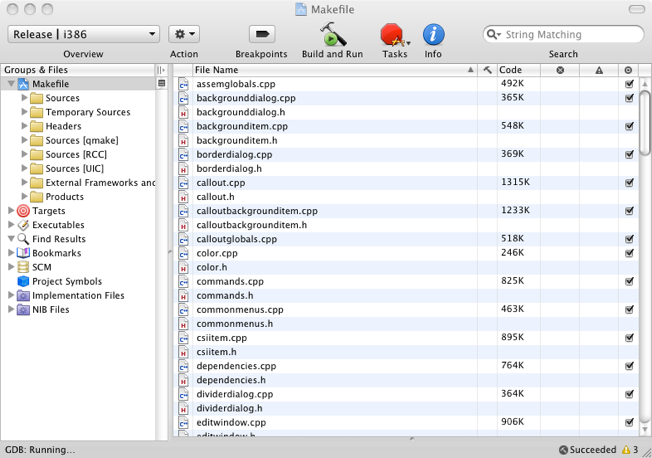
By default XCode selects a debug build. Click on the pull-down menu highlighted above to select a release build. Then double-click on the Makefile in the “Groups & Files” panel to edit the Makefile properties. A window will open as shown below.
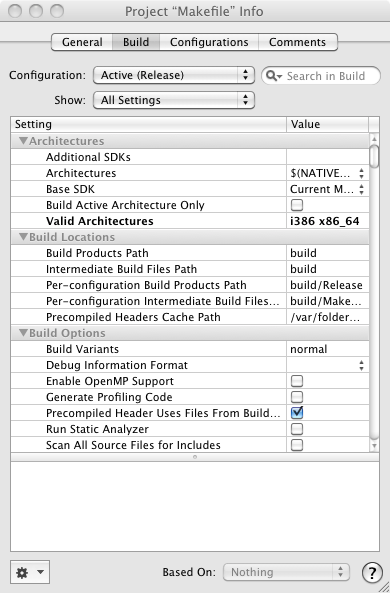
By default the Makefile generated includes targets for older PowerPC (ppc) architectures. On my i386 Mac running Mac OS 10.6 I discovered that the linker step would fail if these targets remained in the Makefile. So we can edit them out by double-clicking on the Valid Architectures line and in the dialog box select remove all the architectures except i386 and x86_64.
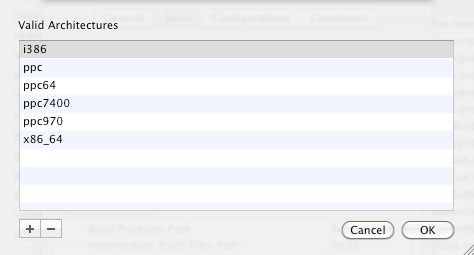
Select the ppc, ppc54, ppc7400 and ppc970 lines and click on the - button. Then click ok. Close the Makefile Info window.
And now (drum roll) we can build LPub4! Click on the “Build and Run” button and the build should commence:
All going well the build should complete and then Lpub4 will open and run from within XCode. Test it out to make sure everything works ok, and then you can quit XCode.
The LPub application will be saved in the LPub4 folder that contains the Makefile.xcodeproj we created earlier.
Create an application bundle
Now we have the LPub.app application built there is one final step. We would like to be able to distribute the LPub application as an application-bundle. In the Mac world an application bundle contains everything the application needs to run; you can drag it into your Applications folder and when you are done with it you drag it to the Trash.
Luckily the good folks at Qt have created a script to automate building a Mac application bundle using Qt libraries. And they have sensibly named it macdeployqt. To use it simply open the Terminal in the directory contain the LPub.app and run
/usr/bin/macdeployqt Lpub.app -dmg
The -dmg option creates a disk-image to contain the final application in.
And here is one I prepared earlier: a compiled version of LPub.dmg version 4.0.0.10 for Mac OS 10.6!
Enjoy!
